
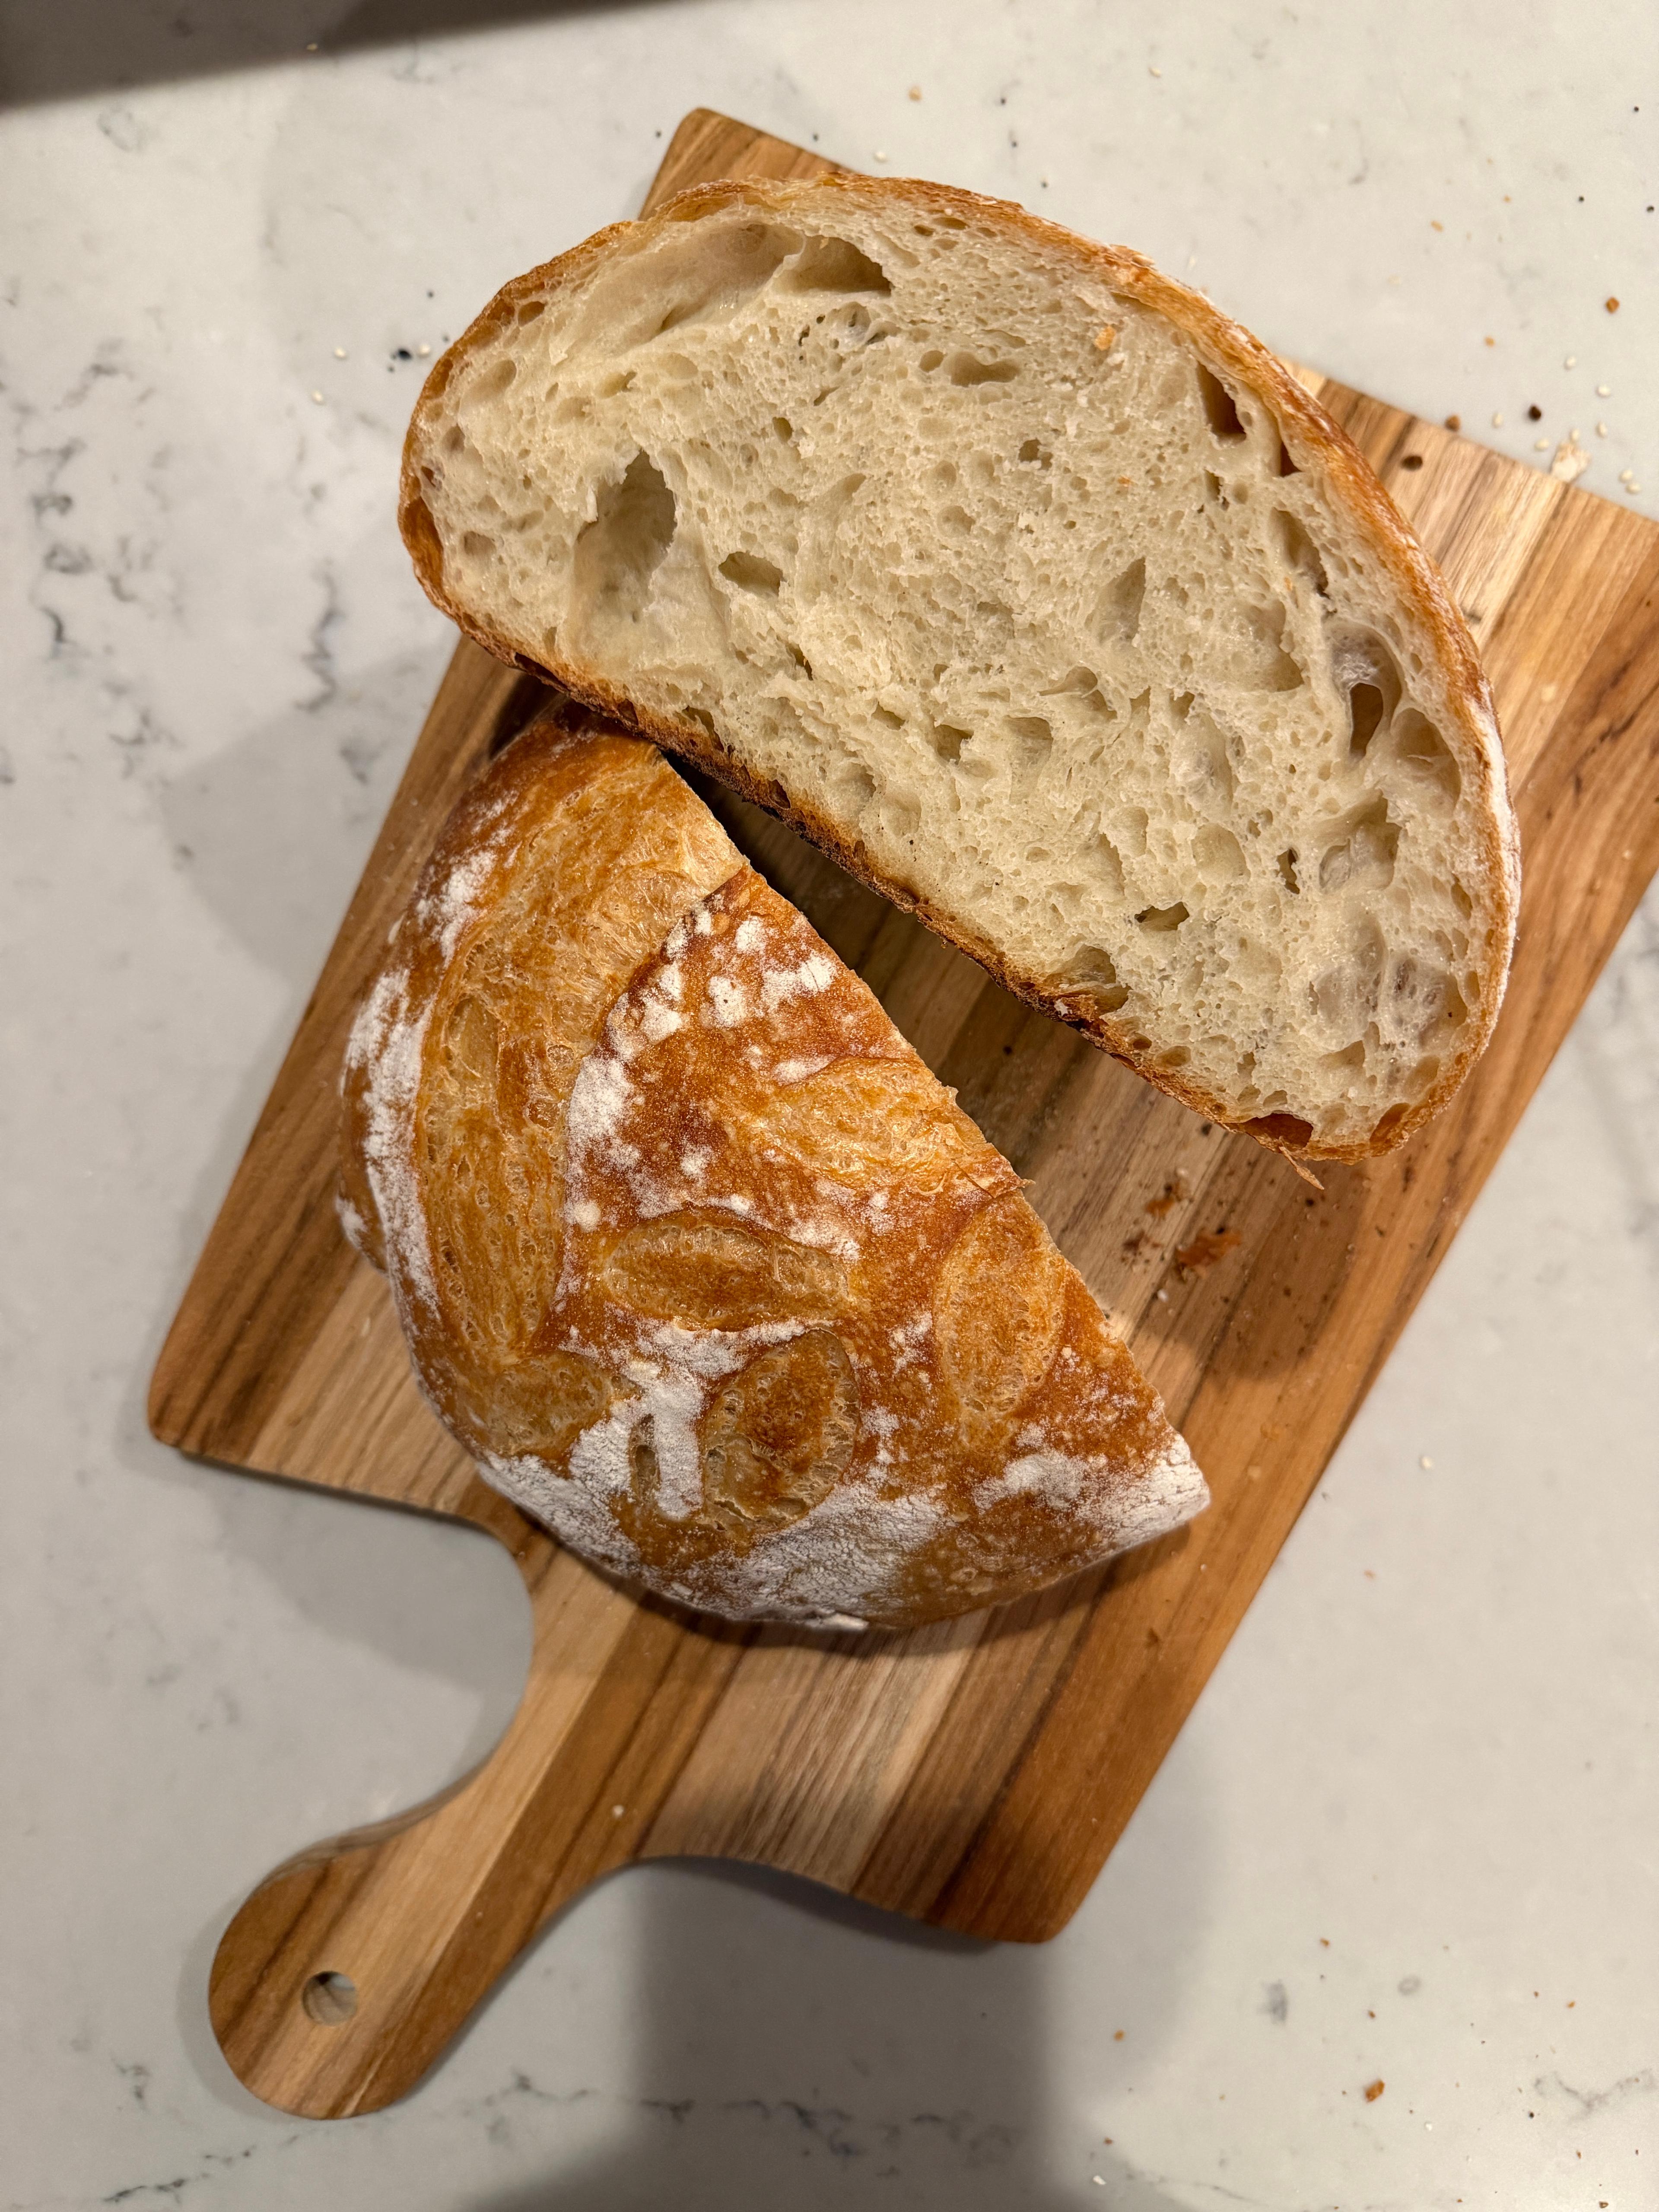
Crusty Dutch Oven Bread
This bread has a golden, crackly crust and a super airy, chewy crumb, with a flavor that tastes like it came straight from a French artisan bakery. It’s a three-day weekend project, but most of it is hands-off, as the dough needs 48 hours of fridge time. I use a poolish as a flavor-kickstarter, so there’s no sourdough starter needed for this bread.
 Dutch oven
 Bread
Crusty Dutch Oven Bread
A beautiful Dutch oven bread with a blistery, golden crust and an airy, chewy crumb, slow-fermented over a weekend with no sourdough starter needed.
Ingredients
- For the poolish
- For the bread
Method
125g bread flour, 125g water at room temperature, tiny pinch of active dry yeast
To a small bowl or glass container, add the bread flour, room temperature water (for me, this is usually 74°F (23°C)) and the yeast. Mix until well combined and cover loosely with plastic wrap or a towel. Set aside and let ferment at room temperature for at least 4, but ideally up to 17 hours. 4 hours is the bare minimum. If you have the time, try to give it 12-17 hours, I find this to be the sweet spot for fermentation. This mixture is your poolish, also known as a pre-ferment: a small portion of the total dough that has been fermenting for a while and that you’ll add to your actual bread dough. This fermentation develops a deeper flavor that you can’t get from a dough made in a few hours. You can read more on what a poolish is and how it can improve your bread in note 1.
Ripe poolish, 235g water at room temperature, 1g active dry yeast
When your poolish has doubled in size and is looking super bubbly, it’s properly fermented and ready to use. If you ferment it for 4 hours it most likely won’t get to this point, but you can start using it. In a medium bowl, add the room temperature water, the yeast and the ripe poolish. Stir gently until you see the poolish starting to dissolve in the water. It doesn’t need to fully dissolve but you want to loosen it a bit.
375g bread flour, 13g fine salt
In a separate bowl, mix the bread flour and the salt, then add this to the bowl with the wet ingredients. Stir with a wooden spoon or spatula, until a shaggy dough forms.
With soaking wet hands, now mix the shaggy dough in the bowl till it forms a cohesive ball, but it doesn’t need to be smooth. This should take about 1 minute total. Cover the bowl with plastic wrap or a damp towel and let rest for 30 minutes.
Now perform your first set of stretch and folds: with soaking wet hands (so the dough won’t stick), gently hook your fingers under the dough and grab it with your thumbs, pull it up until it’s long enough to cover 70% of the dough ball and you feel it resisting, without it tearing. Now fold it over to the opposite side of the dough and press it down a bit so it sticks. Turn the bowl a quarter and repeat. Do a total of 4 to 7 stretches and folds. Now pick up the dough ball and turn it, placing it upside down in the bowl — so the seams from the folds are at the bottom. This strengthens the gluten formation and creates tension which will result in a better structure for the bread. Cover and let rest for 30 minutes. See note 2 for more information on what the stretch and fold method does for your dough.
Perform your second set of stretch and folds, and place the dough ball seam side down back in the bowl. Cover and let rest for 60 minutes.
Perform your third and last set of stretch and folds. Place the dough ball seam side down in the bowl again, then cover with plastic wrap and then a damp towel. Place in the fridge for a long, cold fermentation: 48 hours.
After 48 hours, take the bowl out of the fridge and place it on the counter. Let come to room temperature for 1 hour. Then, on a lightly floured surface, tip your dough out smooth side down and start the final shaping of the dough: gently stretch the edges out and fold them into the center pressing them down gently so they stick, working your way around the dough. Now flip it seam side down, cup your hands around it and pulling it toward you in short strokes, turning it slightly each time, until the surface is smooth and has tension. Now place the dough ball into a banneton lined with a clean towel and flour, seam side up. Cover loosely with the towel you laid the bread in and allow the bread to have its final proof, for 1 hour.
Place your Dutch oven with the lid on in your oven and preheat to 450°F (230°C) at least 40 minutes before your final proof is done, as it is very important to bake this in a very hot oven and pan. When it’s time to bake, tip your shaped dough onto a piece of parchment paper and score it about ½ in (1 cm) deep (see note 3 for more information and tips). Take the pan out of the oven, lower the dough in using the parchment, and place the lid back on. Bake for 20 minutes, then take the pan out, remove the lid, reduce oven temperature to 425°F (220°C) and bake for another 17 minutes. Let the bread cool for at least 1 hour on a cooling rack before slicing, and enjoy!
Note 1: A poolish is a type of pre-ferment, which allows for more flavor development and an increase of your dough’s extensibility. It’s made from equal parts water and bread flour, and a teeny tiny bit of yeast. How much yeast to use is dependent on how long you are allowing your poolish to ferment and the temperature of your kitchen. I like to ferment for at least 12 hours, and since my kitchen temperature usually is 73°F (23°C), for me that means I only use 0.1 to 0.2 grams active dry yeast for this recipe. For reference, one tsp of active dry yeast usually is 3 grams. You can tell your poolish is properly fermented and ready to use by a few signs: it has roughly doubled in size, it’s very bubbly and smells yeasty and sweet. Sometimes, you can see your poolish is slightly starting to sink in the middle. An overripe poolish, however, has collapsed, which you can tell by a mark left on the side of the container, and smells sour. The yeast has started to break down the gluten and your bread dough will turn out weak.
Note 2: Stretching and folding your dough is a technique to build structure in your bread without kneading. When you first mix your bread dough, the proteins in your flour combine with the water and start forming gluten, a stretchy network. This is what makes your dough come together into a cohesive ball that is somewhat elastic and extensible. By repeatedly stretching and folding your dough (every 30 minutes in this recipe), you rearrange the gluten strands that are forming, giving them a chance to link to each other and form longer, stronger chains. You will feel your dough getting stronger and smoother with every set of stretch and folds. After each set, pick up the dough and place it upside down, seam side down. This creates tension on the surface of the dough, which helps it hold its shape and trap the gas the yeast produces, so your bread rises up instead of spreading out.
Note 3: Scoring your bread right before you bake it is absolutely essential. It allows your bread to release steam, as the dough expands quickly as you bake it. This is called ‘oven spring’. Without scoring, your bread would burst in places where the surface is the weakest, resulting in a weird-looking loaf. Use a very sharp lame or clean razor blade if you have one, but a sharp serrated knife also works. Make one quick and confident cut without making a sawing motion, because that way you could tear the dough. Hold the blade at a 30-45 degree angle if you want an ‘ear’; a raised flap, or cut it straight down if you want the loaf to open to both sides evenly. The Dutch oven lid traps the steam that comes off the dough, which will keep the crust soft for the first part of the bake, so the bread can rise and open up fully before it sets.